Once the NCR is created and linked to its checklist inspection point (where applicable), a request for approval can be submitted.
Note: Before you can request approval for an NCR, you must set up your Basic Workflow for Approvals.
Relevant Links:
Attach NCR to checklist inspection points
Tutorial Video
Instructions
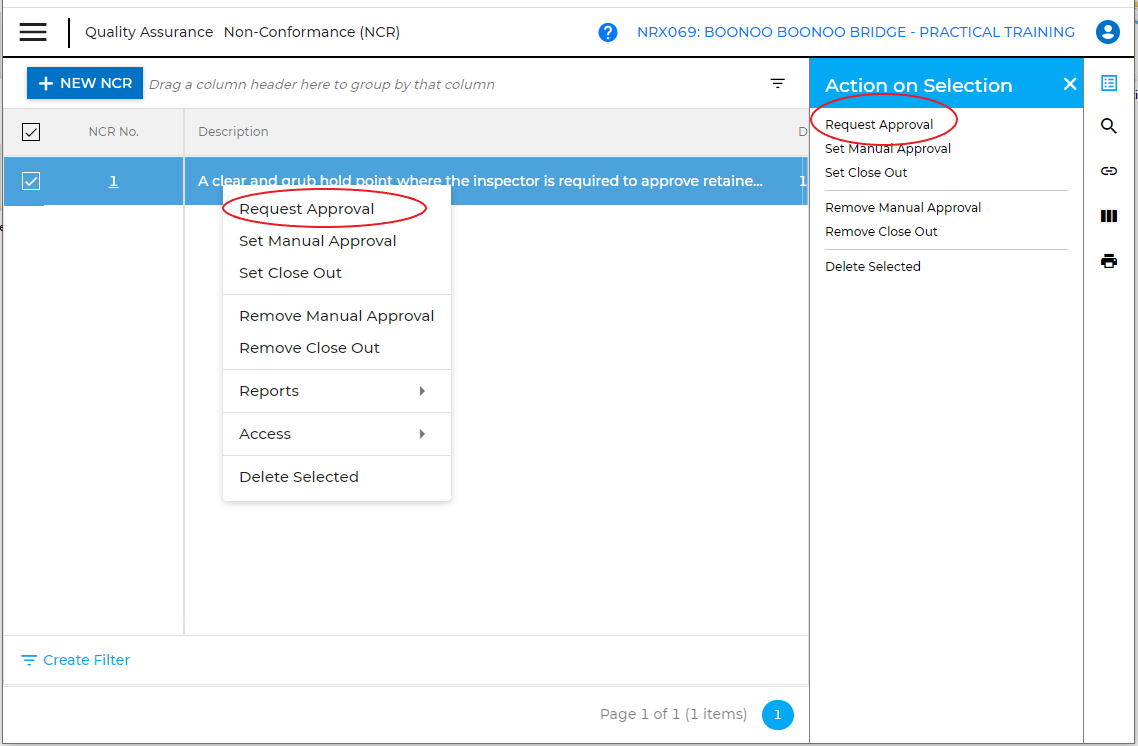
1. Navigate to the NCR register (Quality Assurance > Non-conformance(NCR)). Select the relevant NCR and click on the “Notepad” icon, and select “Request Approval". (Alternatively, right-click on the NCR item to select the same.)
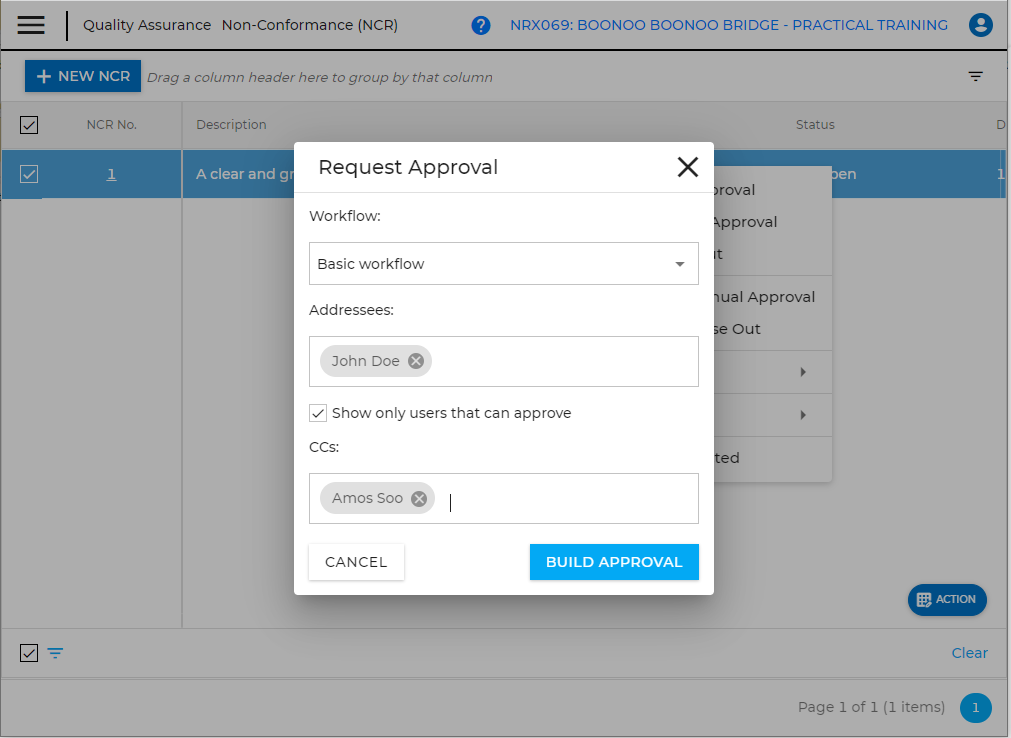
2. Complete the followings:
- Workflow - Select “Basic workflow”
- Addressees - Select the person you are requesting to approve the NCR ( By default, it will show only users that can approve. A recent new feature allows you to send to Groups. To learn how, refer to "Create Groups" and "Use Groups" ).
- CC – copy another person, if applicable
Click “Build Approval”.
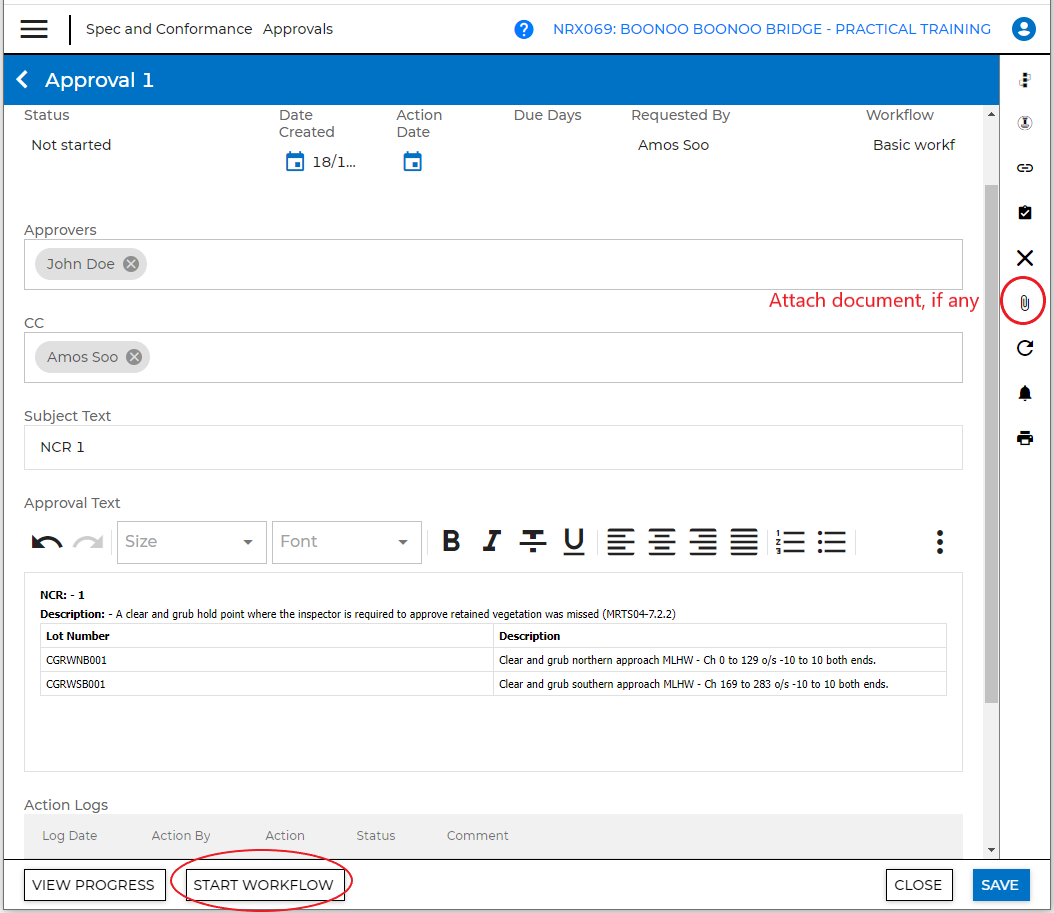
3a. Here, you can click on the “Paper Clip” icon on the right panel to attach any document or photo, to support your report.
Click on “Start Workflow".
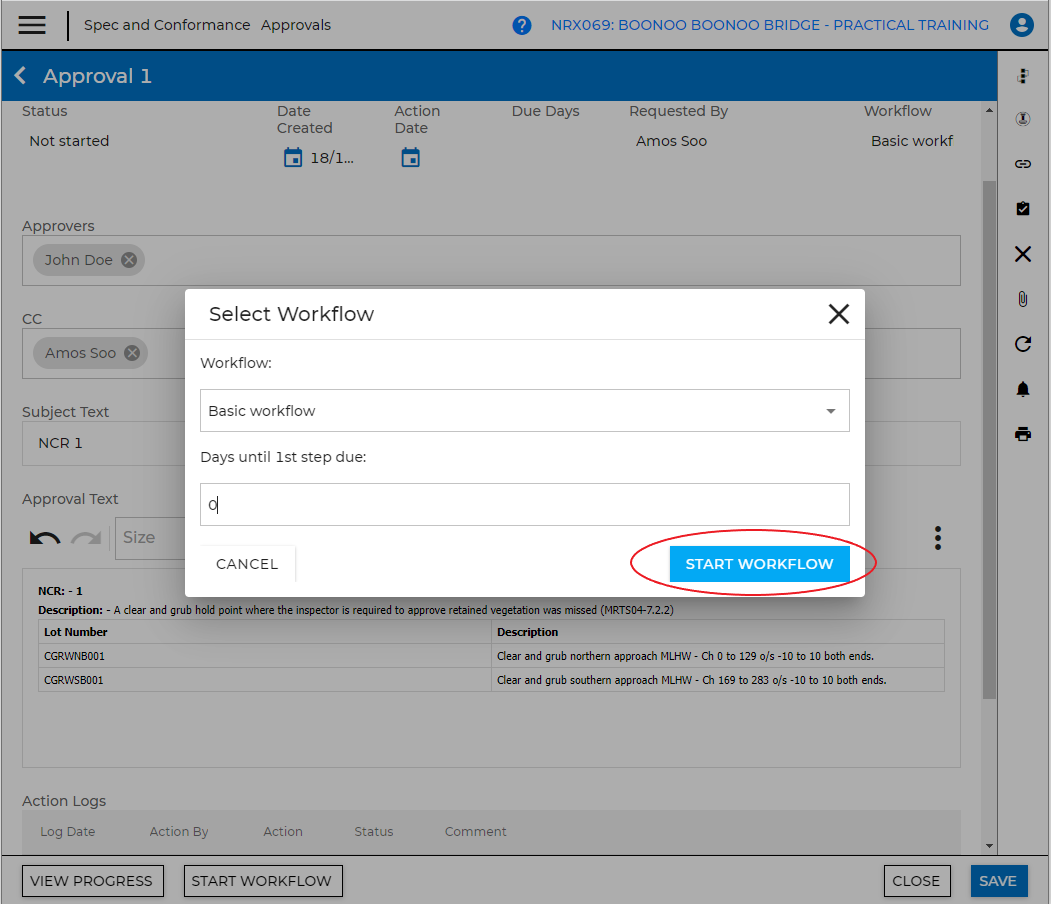
3b. Enter the number of days until 1st Step due as required by your deadline. Click on “Start Workflow” again in the dialog box. Click “Save.”
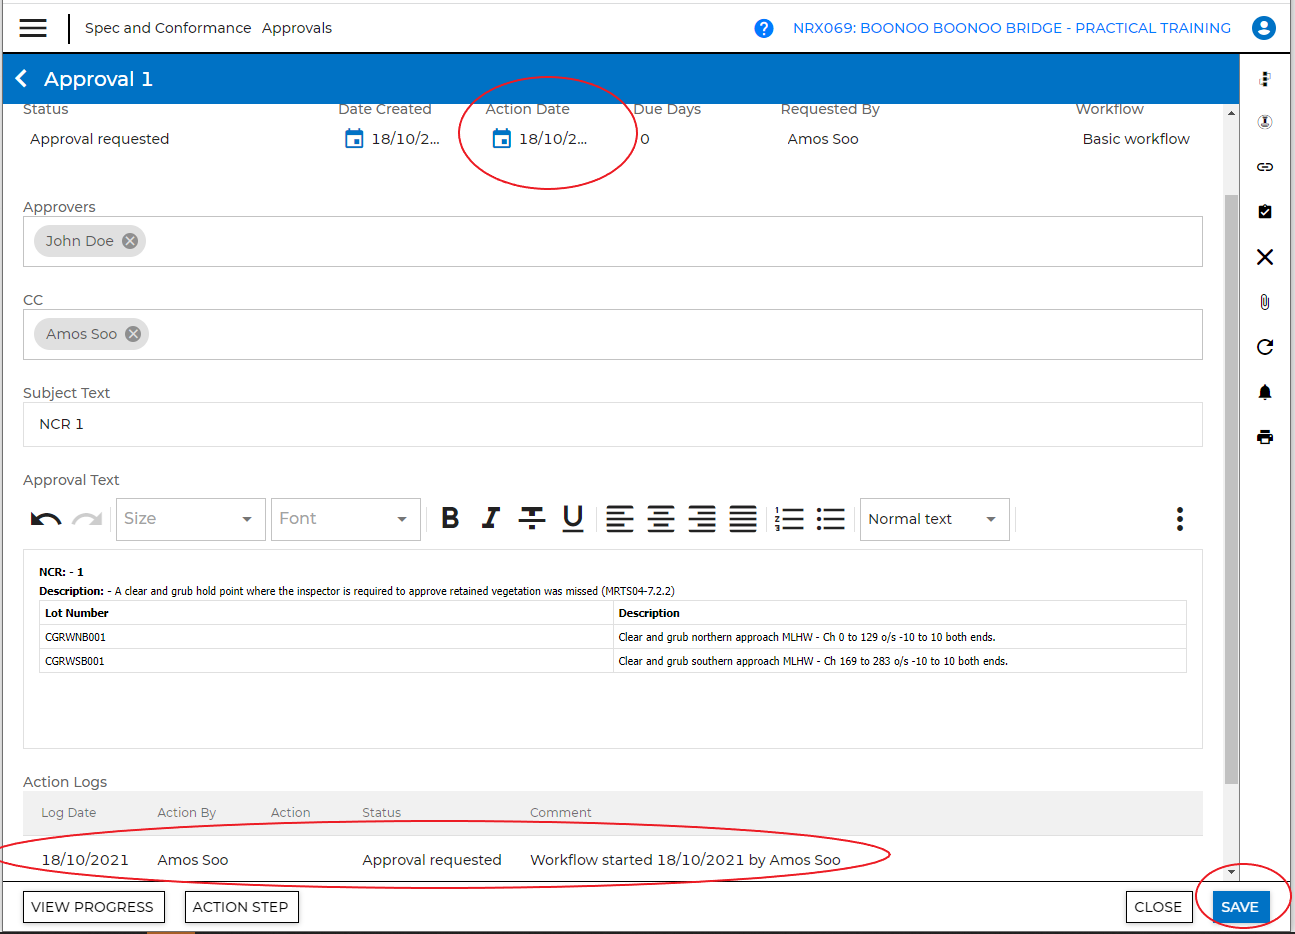
4. You can now see the Action Date at the top and an entry in the “Action Logs” at the bottom.
Click “Save”. (The approver will receive an email with a link to login and approve the request).
5. In the NCR register, you can see the NCR’s “Status” and its “Date Raised”.

Comments
0 comments
Please sign in to leave a comment.